 |
DIY • Do it Yourself • Weekend Projects • BIG Projects • LITTLE Projects | |||||
|
DIY • Do it Yourself • Weekend Projects • BIG Projects • LITTLE Projects | |||||
How Do I Share My How-To?It's really pretty easy, pictures and videos of the steps it takes to complete your project are stored on YouTube and picasaWeb. Once your "final" video is stored on YouTube, your project will show in the listings on the site. All this is controlled by our Creator's Tools. Basically, you start a project by writing up the project idea. Step 1. Sign up for a free Creator's Account to gain access to the Creator's Tools. Step 2. Login Step 3. Push the "Create New Project" button on the Creator's Tools. Make a name (you can change it later) for your project. And describe your plans to use as notes to guide the creation of the steps. Step 4. When you've finished providing all the steps to your project, shooting the videos and saving to google video via the Creator's Tool Panel, you are ready to write the introductory paragraph with an interesting story of how you did it, or how you do it in the case of a professional services presentation. Step 5. Last but not least create and upload the video (to YouTube) which is the video that will be used to summarize the project. If you were building a robot, this final video would show the robot running around, doing fun things that will inspire others to create their version of your project. That's it... Watch the views and ratings for your project pile up along with the sales commissions! Or get a customer because you showed how you remodel a house. |
FAQ About Becoming A CreatorQ. Why would I go to all that work, building something, then put it on a website like C What I Can Do? What's the point? A. Actually, there are a couple of forms for a reward:
|
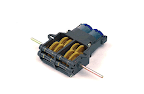
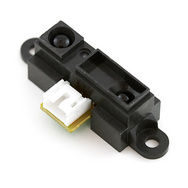
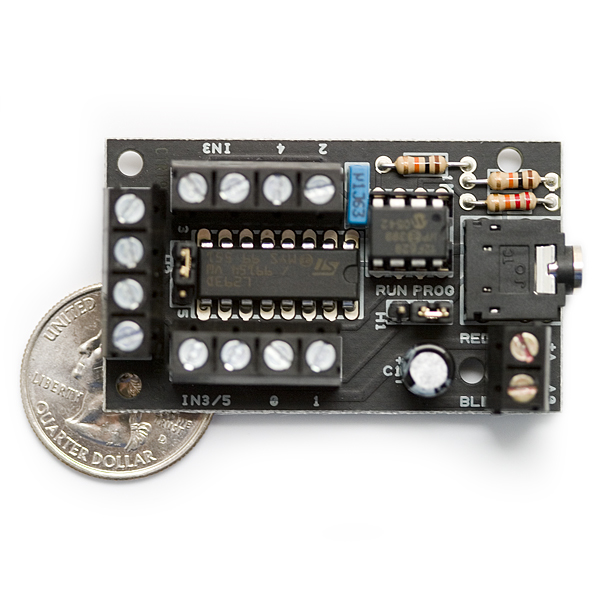
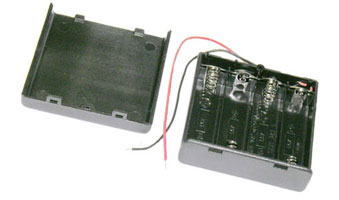
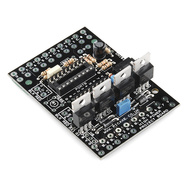
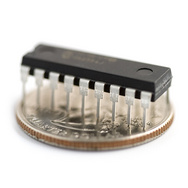
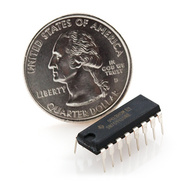
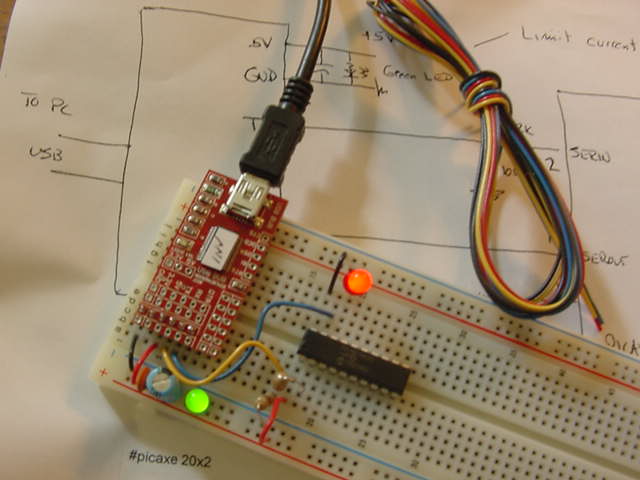
Autonomous Robot PVC "Pickup Truck" ... 32045 Views Author's name: weRbots I built this robot over many variations, most of which are shown in various forms on this very website. Well Now, I`ve gone and Made My Robot Into an Autonomous Pickup Truck... It`s working well enough to smash into things, but avoid smashing into me. I will fearlessly step in front of a power-chair controlled by a couple of chips with IR sensors. This sounds like a movie promo: "See video of human interacting with primitive robots." Barefoot. On the deck. This project shows you how often the robot actually has me walking around the deck with it. Disregard the Deck Furniture variously stacked around the place, I want the thing to see and navigate them, but not just yet. Did I mention this thing is held together by gravity and rubber bands? I said the robot was primitive, I just didn`t mention the human was also primitive. Frame On Top It`s Own Weight Holding it in Place The PVC Frame sits on top of the cover of the mini Jazzy. It is held in place only by the large areas of contact the PVC makes with the body. Since there is significant weight, the frame sits quite still, even in sometimes violent interactions with items the Robot fails to navigate. Real Wooden "Floor Board" The PVC Frame sits on top of the cover of the mini Jazzy. It is held in place only by the large areas of contact the PVC makes with the body. Since there is significant weight, the frame sits quite still, even in sometimes violent interactions with items the Robot fails to navigate. Two-Bagger Pickup Bed This results in a flat-bed for the bot, one which was designed to hold two grocery bags side by side. I haven`t trusted this thing yet to haul actual groceries, nor has it left the confines of the back deck. But, just watch me talking to it, following it around like a human pet. And you will know, soon it will be asking for the car keys!!! Rubber Bands Hold It All Together The large and in-charge pieces are wrapped in rubber bands. The rubber bands are sometimes wrapped around the pvc pipes as well when more strength is needed. The whole electronics package including RGB LED that can flash colors to tell us when the Robot sees an object in it`s field. Converting the Power Chair There are many projects on this site which deal with each stage of development. Sizing the resistors for proper forward/reverse and left/right speeds. (Be very careful with speed, we are asking sensors to determine inches a couple inches moving can crush bone or produce painful bruises.) Wiring Locating the connections to the correct pins in the controller. Bringing the wires out ( +,-,F/R,L/R ) Electronics Using the picAxe (or Arduino) Controller to control a set of LEDs to use as indicators, and to control the dual H-Bridge so it provides 3-State signals to the Joystick in the controller. The H-Bridge is driven by controlling the length of the "on" time while allowing you to switch between: GND, +Vcc, and Open. By using a dual H-Bridge, you can move forward and steer right or left with another timed tri-state signal. In this prototype version, I mounted the whole thing on a proto-jumper board so I could sort of organically grow the sensors, and indicators. I already plan to use ultrasonic transducers, now that I have IR controlling the base pretty safely. What comes after Ultrasonics? Video is in there as well as some kind of integrated RF, but the base of the thing is most important, and will, on it`s own navigate a fairly cluttered environment. Test Software This is the software that allows you to fine-tune your unit so it works best for your application. ----------------------------------------------- `----------------------------------------------------------------------------- ; ***** Power Chair Robot ***** ; ; Filename: pongTestBase04.bas ; Date: 10/01/2013 ; ; File Version: 0.4 ; Written by: Jim H ; Used to test FrameWork Bot, ; Permits you to find which of the sensors has detected what value ; Press Red Button to go until an obstruction, where you stop ; Operates with 3 sensors Left=Red, Center=Grn, Right = Blu RGBLED ` ------------------------------------------------------------ ` Compiler Directives #picaxe 20m2 ` ----------------------------- ` ` Pinout and Definition of Legs ` ````````````````````````````````````````````````````` ` `pin 1 VCC ` pin 20 VSS `pin 2 SerialIn pin 19 a.0 SerialOut `pin 3 C.7 ADC3/Out/In pin 18 b.0 ADC1/In/Out `pin 4 C.6 IN pin 17 b.1 ADC2/in/out `pin 5 C.5 hpwmA/pwm/out/in pin 16 b.2 ADC4/in/out `pin 6 C.4 hpwmB,SRNQ/out/in pin 15 b.3 ADC5/in/out `pin 7 C.3 ADC7/hpwmC/out/in pin 14 b.4 ADC6/hpwmD/in/out `pin 8 C.2 ADC8/kb clk/out/in pin 13 b.5 ADC10/hi2c sda/hspi sdi/in/out `pin 9 C.1 ADC9/hspi sdo/kb data/out/in pin 12 b.6 ADC11/hserin/in/out `pin 10 C.0 hserout/out/in pin 11 b.7 hi2c scl/hspi sck/in/out ` ------------------------------------------------------------- ` Program Wide Symbols Symbol rtFrontSensor = W0 Symbol frontSensor = W1 Symbol lftFrontSensor = w2 Symbol rearSensor = w3 Symbol sensorTemp = w4 Symbol flag = w5 Symbol frontRight = b.0 `pin 18 Symbol frontCenter = b.1 `pin 17 Symbol fwdRev = b.2 `pin 16 Symbol enFR = b.3 `pin 15 Symbol lftRgt = b.4 `pin 14 Symbol backCenter = b.5 `pin 13 Symbol enLR = b.6 `pin 12 Symbol scl = b.7 `pin 11 Symbol frontLeft = c.1 `pin 9 Symbol ledRed = c.2 `pin 8 Symbol ledBlu = c.3 `pin 7 Symbol ledGrn = c.4 `pin 6 Symbol click = c.6 `pin 4 the button Symbol IRdet = c.7 `pin 3 adc3 Symbol frontLimit = 130 Symbol backLimit = 200 Symbol rgtLimit = 210 Symbol lftLimit = 220 Symbol irLimit = 400 ` initialize --------------------------------------------------- let dirsB = %11011100 let dirsC = %00011100 low enFR, enLR ` Shut Drive Motors setfreq m8 ` NOTE: operates at 9600 baud (setfreq m8) `--------------------------------------------------------------- ` System Operation ` ` subs: ` look fwd ` look back ` check values and ` continue ` stop ` turnLeft `steer ` turnRight `steer ` backup ` `---------------------------------------------------------------- `---------------------------------------------------------------- ;;;goto repeater let flag = 255 Pause 100 ` allow system to settle when booting high ledGrn, ledBlu, ledRed `warning lights offcc z loopDeloop: if pinC.6 = 1 then low enFR, enLR ` Shut Drive Motors ` gosub lookFwd ` get Value in rtFrontSensor ` gosub lookBak ` get Value in lftFrontSensor ` gosub displayIt pause 20 goto loopDeloop else goto mainProg endif mainProg: `goto repeater ; Uncomment this to run the repeater loop simple F/B/L/R, and again... high ledGrn, ledBlu, ledRed `warning lights off ` ----- move forward, evaluate, proceed, unless backup gosub lookFwd ` get Value in rtFrontSensor gosub lookBak ` get Value in backUpSensor ` gosub displayIt ; Use for debugging only if you are stuck, too much delay if lftFrontSensor >= lftLimit OR lftFrontSensor >= irLimit then ; reached the limit:stop:in this version low enFR,enLR `stop low ledRed goto loopDeloop endif if frontSensor >= frontLimit OR frontSensor >= irLimit then low enFR,enLR `stop low ledGrn goto loopDeloop endif if rtFrontSensor >= rgtLimit OR rtFrontSensor >= irLimit then low enFR,enLR `stop low ledBlu goto loopDeloop endif ; if rearSensor >= backLimit then ; low enFR,enLR `stop ; goto loopDeloop ; endif ; if rearSensor < backLimit then ; high enFR ; low fwdRev `go forward ; pause 50 `kick brakes off, etc ; endif high enFR, fwdRev `go forward low enLR ` I said Forward Fool! pause 50 `kick brakes off, etc goto mainProg ` displayIt: ;------ stream values to serial port `setfreq m4 `if you have only 4800 baud SerTxD("F: ",#frontSensor," L: ",#lftFrontSensor," R: ", #rtFrontSensor," Back: ",#rearSensor,CR, LF,CR,LF) pause 200 ; give the tty a breather.. return lookFwd: ` RIGHT ;----- Look rtFrontSensor let sensorTemp = rtFrontSensor ` last sample readadc10 frontRight, rtFrontSensor ` sonar ana input rtFrontSensor = rtFrontSensor + sensorTemp rtFrontSensor = rtFrontSensor / 2 pause 10 `steady... steady... ` LEFT ;----- Look lftFrontSensor let sensorTemp = lftFrontSensor ` last sample readadc10 frontLeft,lftFrontSensor pause 10 `let it settle lftFrontSensor = lftFrontSensor + sensorTemp lftFrontSensor = lftFrontSensor / 2 ;----- CENTER FRONT let sensorTemp = frontSensor ` last sample readadc10 frontCenter,frontSensor pause 10 `let it settle frontSensor = frontSensor + sensorTemp frontSensor = frontSensor / 2 return lookBak: ;----- Look back Sensor let sensorTemp = rearSensor ` last sample readadc10 backCenter, rearSensor ` sonar ana input pause 10 `steady... steady... rearSensor = rearSensor + sensorTemp rearSensor = rearSensor / 2 return repeater: ; --- Repeater moves a short distance in each of the four directions: ; Forward, Reverse, Right then Left continuously high enFR high fwdRev `forward pause 2500 low fwdRev,enFR `stop pause 1600 high enFR low fwdRev `reverse pause 3100 low fwdRev,enFR `stop pause 1600 high enLR `left high lftRgt pause 2500 low lftRgt,enLR `stop pause 1600 high enLR low lftRgt `right pause 2500 low lftRgt,enLR pause 1600 goto repeater Operational Prototype Software Don`t go without shoes when you run this (Although I did, in the video). This is what one would call Operational Base Unit Code Release 0.1 meaning, it works, with no guarantees that I got anything right. If you do this correctly, you will change some values when you run the test code. Change to the tested values you came up with during testing runs (run and stop). `----------------------------------------------------------------------------- ; ***** Power Chair Robot ***** ; ; Filename: pongBase01.bas ; Date: 10/02/2013 ; ; File Version: 0.1 ; Written by: Jim H ; Built On Test FrameWork Bot, ; Permits you to find which of the sensors has detected what value ; Press Red Button to go until an obstruction, where you stop ; Operates with 3 sensors Left=Red, Center=Grn, Right = Blu RGBLED ; ; Red Turn Left ; Green Stop Backup Turn Random(Left/Right) recheck, then react ; Blue Turn Right ` ------------------------------------------------------------ ` Compiler Directives #picaxe 20m2 ` ----------------------------- ` ` Pinout and Definition of Legs ` ````````````````````````````````````````````````````` ` `pin 1 VCC ` pin 20 VSS `pin 2 SerialIn pin 19 a.0 SerialOut `pin 3 C.7 ADC3/Out/In pin 18 b.0 ADC1/In/Out `pin 4 C.6 IN pin 17 b.1 ADC2/in/out `pin 5 C.5 hpwmA/pwm/out/in pin 16 b.2 ADC4/in/out `pin 6 C.4 hpwmB,SRNQ/out/in pin 15 b.3 ADC5/in/out `pin 7 C.3 ADC7/hpwmC/out/in pin 14 b.4 ADC6/hpwmD/in/out `pin 8 C.2 ADC8/kb clk/out/in pin 13 b.5 ADC10/hi2c sda/hspi sdi/in/out `pin 9 C.1 ADC9/hspi sdo/kb data/out/in pin 12 b.6 ADC11/hserin/in/out `pin 10 C.0 hserout/out/in pin 11 b.7 hi2c scl/hspi sck/in/out ` ------------------------------------------------------------- ` Program Wide Symbols Symbol rtFrontSensor = W0 Symbol frontSensor = W1 Symbol lftFrontSensor = w2 Symbol rearSensor = w3 Symbol sensorTemp = w4 Symbol flag = w5 Symbol frontRight = b.0 `pin 18 Symbol frontCenter = b.1 `pin 17 Symbol fwdRev = b.2 `pin 16 Symbol enFR = b.3 `pin 15 Symbol lftRgt = b.4 `pin 14 Symbol backCenter = b.5 `pin 13 Symbol enLR = b.6 `pin 12 Symbol scl = b.7 `pin 11 Symbol frontLeft = c.1 `pin 9 Symbol ledRed = c.2 `pin 8 Symbol ledBlu = c.3 `pin 7 Symbol ledGrn = c.4 `pin 6 Symbol click = c.6 `pin 4 the button Symbol IRdet = c.7 `pin 3 adc3 Symbol frontLimit = 100 Symbol backLimit = 350 Symbol rgtLimit = 150 Symbol lftLimit = 150 Symbol irLimit = 400 ` initialize --------------------------------------------------- let dirsB = %11011100 let dirsC = %00011100 low enFR, enLR ` Shut Drive Motors setfreq m8 ` NOTE: operates at 9600 baud (setfreq m8) let flag = 255 Pause 100 ` allow system to settle when booting high ledGrn, ledBlu, ledRed `warning lights offcc z `--------------------------------------------------------------- ` System Operation ` ` subs: ` look fwd ` look back ` check values and ` continue ` stop ` turnLeft `steer ` turnRight `steer ` backup ` `---------------------------------------------------------------- `---------------------------------------------------------------- loopDeloop: if pinC.6 = 1 then low enFR, enLR ` Shut Drive Motors pause 20 goto loopDeloop else goto mainProg endif mainProg: high ledGrn, ledBlu, ledRed `warning lights off ` ----- move forward, evaluate, proceed, unless backup gosub lookFwd ` get Value in rtFrontSensor gosub lookBak ` get Value in backUpSensor if frontSensor >= frontLimit OR frontSensor >= irLimit then low enFR,enLR `stop low ledGrn low enFR, enLR ` Shut Drive Motors pause 20 gosub goBack goto loopDeloop endif if lftFrontSensor >= lftLimit OR lftFrontSensor >= irLimit then ; reached the limit:stop:in this version low enFR,enLR `stop low ledRed low enFR, enLR ` Shut Drive Motors pause 20 gosub steerRight ; goto loopDeloop endif if rtFrontSensor >= rgtLimit OR rtFrontSensor >= irLimit then low enFR,enLR `stop low ledBlu low enFR, enLR ` Shut Drive Motors pause 20 gosub steerLeft ; goto loopDeloop endif if rearSensor >= backLimit then low ledGrn, ledBlu, ledRed `warning lights white (backup something stuck behind bot) low enFR,enLR `stop goto loopDeloop endif ; if rearSensor < backLimit then ; high enFR ; low fwdRev `go forward ; pause 50 `kick brakes off, etc ; endif high enFR, fwdRev `go forward low enLR ` I said Forward Fool! pause 50 `kick brakes off, etc goto mainProg ` lookFwd: ` RIGHT ;----- Look rtFrontSensor let sensorTemp = rtFrontSensor ` last sample readadc10 frontRight, rtFrontSensor ` sonar ana input pause 10 `steady... steady... rtFrontSensor = rtFrontSensor + sensorTemp rtFrontSensor = rtFrontSensor / 2 ` LEFT ;----- Look lftFrontSensor let sensorTemp = lftFrontSensor ` last sample readadc10 frontLeft,lftFrontSensor pause 10 `let it settle lftFrontSensor = lftFrontSensor + sensorTemp lftFrontSensor = lftFrontSensor / 2 ;----- CENTER FRONT let sensorTemp = frontSensor ` last sample readadc10 frontCenter,frontSensor pause 10 `let it settle frontSensor = frontSensor + sensorTemp frontSensor = frontSensor / 2 return lookBak: ;----- Look back Sensor let sensorTemp = rearSensor ` last sample readadc10 backCenter, rearSensor ` sonar ana input pause 10 `steady... steady... rearSensor = rearSensor + sensorTemp rearSensor = rearSensor / 2 return goForth: high enFR high fwdRev `forward pause 100 low fwdRev,enFR `stop pause 60 return goBack: high enFR low fwdRev `reverse pause 3100 low fwdRev,enFR `stop pause 600 return steerLeft: high enLR `left low lftRgt pause 1500 low enLR `stop gosub goForth pause 60 return steerRight: high enLR high lftRgt `right pause 1500 low enLR gosub goForth pause 60 return It's Easy To: C - What - I - Can - Do • Sign up - Get ID and Password• Plan and Create a Project That Someone Might Enjoy and May Even Want to Build• Link to your creation on your favorite social networking site or blog.• Become famous! Because your projects get a lot of Hits!
|
By Creators DoctorZoidberg: Converting a Flashlight to LED DoctorZoidberg: Home Project: MUTE TV Wearable TV Muter! DoctorZoidberg: Scare Crow - For Modern Gardens - Home Project jim: CwhatIcanDo Website jim: Tour This Website PaulSandin: Butler, a low-cost mobile robot base WeRbots: BEAM BOT: HexBug Exposed! WeRbots: Buggy Bot: Wire Frame Bot Body WeRbots: Easy Cheap Robot Weekend Project WeRbots: RFL Robot Out Of The Box Experience WeRbots: Robot Man: With Robot Demos WeRbots: Build Your Own Track Drive Robot WeRbots: Build a Robot In 5 Minutes WeRbots: i-Mon App WeRbots: How To Make A Virtual Robot in FLASH WeRbots: Droid From Motorola :: A Robot ? WeRbots: Robots Almost Anyone Can Afford WeRbots: How To Build a Robot in a Box WeRbots: picAxe 18m2 for robotics WeRbots: Build a Respectable Autonomous Robot WeRbots: On Line Neighborhood Watch WeRbots: Pong))))) WeRbots: Roboteer`s Guide to BeagleBone Black WeRbots: Autonomous Robot PVC "Pickup Truck" |
By Keywords Action Script 2: How To Make A Virtual Robot in FLASH Ajax: CwhatIcanDo Website Ajax: CwhatIcanDo Specs: RC2 Ajax: battle Android: Droid From Motorola :: A Robot ? Android: battle batting cage installation: Home Installation of a 4 Section In-Ground Batting Cage BEAM Robots: BEAM BOT: HexBug Exposed! BEAM Robots: picaxe 8m: Wall Follower Mouse gets Majorly Modded BEAM Robots: How to build simple analog balancing robots BEAM Robots: battle Block Watch Cam: On Line Neighborhood Watch Cheap Robot: Easy Cheap Robot Weekend Project Cheap Robot: How To Build a Robot in a Box Cheap Robot: Autonomous Robot Built From Power Chair Wheelchair commercial killer: Home Project: MUTE TV Wearable TV Muter! Convert Your Flashlight to LED: Converting a Flashlight to LED Create a Project: HELP :: How To Create a Project CwhatIcanDo HELP: HELP :: How To Create a Project Do it Yourself: Robots Almost Anyone Can Afford Do it Yourself: Scare Crow - For Modern Gardens - Home Project Do it Yourself: Wheelchair Works 3 Ways: Manual, R/C, and Autonomous Do it Yourself: On Line Neighborhood Watch Droid Smart Phone: Droid From Motorola :: A Robot ? Easy to Make Robot: Easy Cheap Robot Weekend Project entertainment: Home Project: MUTE TV Wearable TV Muter! FLASH Applications: How To Make A Virtual Robot in FLASH HELP: Tour This Website How To: CwhatIcanDo Website How To Build Cheap Bots: Robots Almost Anyone Can Afford How To Build Cheap Bots: How To Build a Robot in a Box How To Website: Tour This Website How To Website: CwhatIcanDo Website Infrared Proximity Sensor: Build Your Own Track Drive Robot IR Detector: Build Your Own Track Drive Robot Lighting Projects: Converting a Flashlight to LED logic analyzer: An affordable Logic Analyzer for the workbench. multi: Multi Media Messaging Device Mute the TV: Home Project: MUTE TV Wearable TV Muter! open source: An affordable Logic Analyzer for the workbench. picAxe: Build Your Own Track Drive Robot picAxe: picAxe 18m2 for robotics picAxe 08m: Robots Almost Anyone Can Afford picAxe 14m: picAxe 14m Motor Driver Board: Make Your Own picAxe 14m: How To Build a Robot in a Box picAxe 18m2: picAxe 18m2 for robotics picAxe 18m2: Weekend Project: Get Started With Robots picAxe 18m2: Build a Robot From A Power Wheelchair picAxe 18m2: Autonomous Robot Built From Power Chair Wheelchair picAxe 18m2: Wheelchair Works 3 Ways: Manual, R/C, and Autonomous picAxe 18x: How To Build a Robot in a Box picAxe 18x: picAxe 18m2 for robotics picAxe 18x: Build a Robot From A Power Wheelchair power wheelchair: Wheelchair Works 3 Ways: Manual, R/C, and Autonomous Quick Build Robot: Build a Robot In 5 Minutes RFL Robots: Building an RFL Inspired Upright Robot Base RFL Robots: RFL Robot Out Of The Box Experience robot bending: Morphibian Land Shark robot bending: Build a Robot From A Power Wheelchair Robot Man: Robot Man: With Robot Demos Robot Motor Control: Build the L298 H-Bridge Motor Control Robot Motor Control: Robot Basics Robot Motor Control: picAxe 14m Motor Driver Board: Make Your Own Robot Motor Control: Buggy Bot: Wire Frame Bot Body Robot Motor Control: picAxe 8 bit Motor Controller: Look Inside Robot Motor Control: How to build simple analog balancing robots Robot Motor Control: Build a Robot From A Power Wheelchair Robot Motor Control: Autonomous Robot Built From Power Chair Wheelchair Robot Pets: DogBot the Robo Dog : Robotic WatchDog Robot Pets: Operation of the Tri-Bot From Wowwee! Robot Pets: Robot Man: With Robot Demos robotics: Droid From Motorola :: A Robot ? robotics: Easy Cheap Robot Weekend Project Robots: BEAM BOT: HexBug Exposed! Robots: Robot Basics Robots: Buggy Bot: Wire Frame Bot Body Robots: Build a Robot In 5 Minutes Robots: Build Your Own Track Drive Robot Robots: Easy Cheap Robot Weekend Project Robots: How To Build a Robot in a Box Rumble Bot Conversions: Robots Almost Anyone Can Afford Security System: On Line Neighborhood Watch Select or type in a Keyword: Converting a Flashlight to LED track drive robot: Build Your Own Track Drive Robot Virtual Pet Robot: How To Make A Virtual Robot in FLASH web: CwhatIcanDo Website web 2.0 site: CwhatIcanDo Website web 2.0 site: CwhatIcanDo Specs: RC2 Weekend Project Robots: Easy Cheap Robot Weekend Project Weekend Project Robots: Weekend Project: Get Started With Robots |
Click To Expand / Contract Menus. View by Creator, Category, Keywords or Number of Views.